
Table of Contents
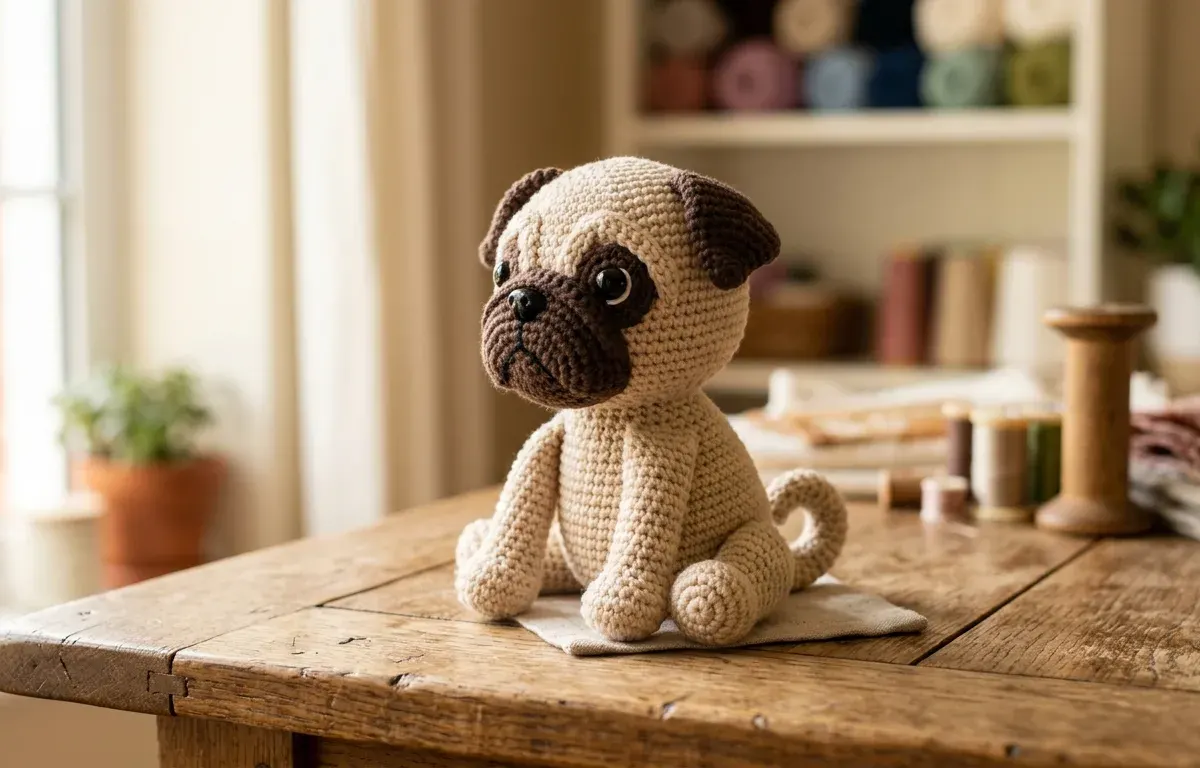
Learning how to crochet a pug dog involves working separate three-dimensional pieces in continuous spiral rounds using single crochet stitches, increasing, and decreasing. The project requires Category 4 medium worsted weight yarn in fawn and black, a 3.5 mm (US E-4) crochet hook, polyester fiberfill stuffing, stitch markers, and a yarn needle. Crafters make the head, square muzzle, folded ears, torso, stumpy legs, and curled tail individually before assembling and embroidering the signature facial wrinkles.
- Use a 3.5 mm hook with worsted weight yarn to keep stitches tight and conceal internal fiberfill stuffing.
- Work the black muzzle in back loops only to create the breed's signature flat square jaw profile.
- Crochet the triangle ears in flat turned rows rather than rounds so they fold naturally forward over the head.
- Follow toy safety standards by embroidering eyes with floss when gifting plushies to children under 3 years.
What is a crochet pug and why it appeals to crafters
A crochet pug is a three-dimensional stuffed canine figure made through the Japanese yarn craft known as amigurumi. Crafters build these plush dogs using continuous spiral stitches, shaping tight single crochet rounds into distinct anatomical parts before assembling them into a finished toy. Pugs make rewarding crochet subjects because their real-world silhouette translates neatly into fiber art. The broad skull, blunt muzzle, forehead skin folds, barrel-like chest, and tightly curled tail give the finished piece instant character.
The American Kennel Club pug breed standard describes the breed as a compact, cobby dog with a square body, large round head, flat black mask, and folded ears. Capturing true fawn and black pug coat characteristics requires clean color divisions between the light head and the dark muzzle mask. Crafters appreciate how easily yarn stitches recreate the historical compact pug structure, turning classic companion dog proportions into a durable, charming desk ornament or gift.
Basic amigurumi concepts you’ll use
Amigurumi projects use a small set of foundational crochet stitches worked in unjoined spirals. Working in continuous rounds without a joining slip stitch prevents visible seams from running down the face or back:
- Magic Ring (MR): An adjustable starting loop that pulls closed tightly around your base stitches, leaving no center gap for fiberfill to escape.
- Single Crochet (sc): The primary stitch of 3D yarn work. It creates a dense, firm fabric that holds internal stuffing securely in place.
- Single Crochet Increase (inc): Crocheting two single crochet stitches into the same stitch to widen the piece smoothly.
- Invisible Decrease (dec): Picking up only the front loops of two adjacent stitches before completing a single crochet, minimizing surface bumps during shaping.
- Back Loops Only (BLO): Working stitches solely through the rear loop of each stitch to leave a sharp horizontal ridge, which defines the flat lower edge of the muzzle.
- Fasten Off (FO): Snipping the working strand and drawing the yarn tail through the last loop to lock your stitches against unraveling.
Tools and materials
Preparing your supplies before making the first stitch ensures even gauge and straightforward assembly:
- Yarn: Category 4 medium worsted weight yarn in fawn or beige (about 150 yards) and black (about 50 yards). Acrylic and mercerized cotton hold stitch definition well and resist fuzzing during assembly.
- Crochet Hook: 3.5 mm (US E-4) crochet hook. Under the Craft Yarn Council standard yarn weight system, Category 4 yarn typically pairs with 5.0 mm to 5.5 mm hooks for blankets or garments, but dropping to a 3.5 mm hook creates the dense, gap-free weave needed for stuffed amigurumi toys.
- Safety Eyes or Floss: Two 9 mm plastic safety eyes with secure lock washers, or black cotton embroidery floss for child-safe embroidered features.
- Safety Nose: One 7 mm plastic safety nose, or black yarn for an embroidered nose.
- Stuffing: High-loft polyester fiberfill.
- Notions: Locking stitch markers to track round starts, a blunt yarn needle, dressmaker pins for positioning parts, and sharp scissors.
Step-by-step guide to crocheting a pug
Crocheting a pug dog follows a modular construction process where each body part is worked individually, stuffed to the appropriate density, and joined with a yarn needle. Following a structured sequence ensures balanced symmetry and clean seams.
Pattern planning and color choices
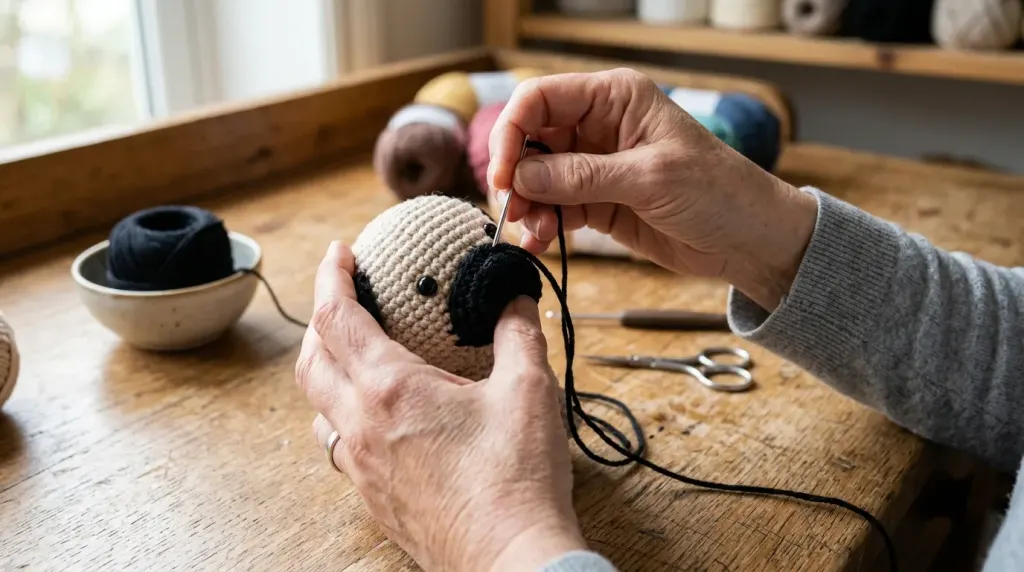
Start by winding your fawn and black yarn skeins and organizing your workspace under bright task lighting. Dark black yarn absorbs light, which can make stitch loops harder to see. Working near a daylight lamp or placing a light-colored cloth across your lap helps illuminate black stitches clearly.
Head and body construction tips
The head and torso form the foundation of your crochet pug figure. Work both sections in continuous spirals using fawn yarn:
Head Construction:
- Round 1: Make a Magic Ring, work 6 sc into the ring (6 sts).
- Round 2: Work 1 inc in each st around (12 sts).
- Round 3: [1 sc, 1 inc] repeat 6 times (18 sts).
- Round 4: [2 sc, 1 inc] repeat 6 times (24 sts).
- Round 5: [3 sc, 1 inc] repeat 6 times (30 sts).
- Rounds 6-10: Work 1 sc in each st around (30 sts).
- Safety Eye Placement: Insert 9 mm plastic safety eyes between Rounds 8 and 9, positioning them approximately 6 stitches apart. Snap the washer backings securely onto the posts inside the head.
- Round 11: [3 sc, 1 dec] repeat 6 times (24 sts).
- Round 12: [2 sc, 1 dec] repeat 6 times (18 sts). Pack polyester fiberfill firmly into the head, shaping it into a rounded dome.
- Round 13: [1 sc, 1 dec] repeat 6 times (12 sts).
- Round 14: Work 6 dec around (6 sts). Fasten off, leaving an 8-inch yarn tail. Thread the tail through the front loops of the final 6 stitches and pull firmly to close the top opening.
Body Construction:
- Round 1: Make a Magic Ring, work 6 sc into the ring (6 sts).
- Round 2: Work 1 inc in each st around (12 sts).
- Round 3: [1 sc, 1 inc] repeat 6 times (18 sts).
- Round 4: [2 sc, 1 inc] repeat 6 times (24 sts).
- Round 5: [3 sc, 1 inc] repeat 6 times (30 sts).
- Rounds 6-9: Work 1 sc in each st around (30 sts).
- Round 10: [3 sc, 1 dec] repeat 6 times (24 sts).
- Rounds 11-12: Work 1 sc in each st around (24 sts).
- Round 13: [2 sc, 1 dec] repeat 6 times (18 sts).
- Round 14: Work 1 sc in each st around (18 sts). Fasten off, leaving a 14-inch tail for attaching to the head. Stuff the torso firmly so it forms a stable, pear-shaped base.
Ears, legs, tail and facial features
The facial features and appendages give the crochet pug its breed character:
Folded Triangle Ears (Make 2):
Using black yarn, crochet in flat turned rows rather than continuous rounds. Flat fabric folds naturally over the forehead and matches authentic pug ear positioning and fold styles.
- Row 1: Chain 6, work 1 sc in the 2nd chain from hook and in each remaining chain across, turn (5 sts).
- Row 2: Chain 1, work 1 sc in each st across, turn (5 sts).
- Row 3: Chain 1, work 1 dec, 1 sc, 1 dec, turn (3 sts).
- Row 4: Chain 1, work 1 sc in each st across, turn (3 sts).
- Row 5: Chain 1, work 1 dec, 1 sc, turn (2 sts).
- Row 6: Chain 1, work 1 dec (1 st). Fasten off, leaving a 10-inch yarn tail for sewing. Do not stuff the ears.
Stumpy Front and Rear Legs (Make 4):
Using fawn yarn, work in continuous rounds to create sturdy legs that hold a classic pug lap dog sitting posture.
- Round 1: Make a Magic Ring, work 6 sc into the ring (6 sts).
- Rounds 2-5: Work 1 sc in each st around (6 sts). Fasten off, leaving an 8-inch yarn tail. Pack a small pinch of fiberfill into the bottom of each leg.
Signature Curled Tail:
Using black or fawn yarn:
- Chain 10 stitches.
- Starting in the 2nd chain from the hook, work 2 sc into each chain stitch across (18 sts). Crocheting two stitches into each foundation chain forces the yarn strip to curl naturally into a tight, spring-like coil. Fasten off, leaving an 8-inch tail.
Square Muzzle:
Using black yarn:
- Round 1: Make a Magic Ring, work 6 sc into the ring (6 sts).
- Round 2: Work 1 inc in each st around (12 sts).
- Round 3: Working in Back Loops Only (BLO), work 1 sc in each st around (12 sts). The ridge formed by BLO creates a square, boxy jawline.
- Insert the 7 mm safety nose into the center of Round 1 and lock the backing in place. Fasten off, leaving a 12-inch yarn tail.
Assembly, stuffing, and finishing
Assembling your crochet pug with precision transforms individual yarn pieces into a cohesive plush sculpture:
- Attach the Muzzle: Center the black muzzle horizontally between the safety eyes, covering Rounds 8 through 11 on the lower head. Pin it securely in place. Use the 12-inch black yarn tail and a yarn needle to sew around the perimeter using mattress stitch, tucking a tiny pinch of fiberfill inside before making the final three stitches.
- Embroider Forehead Wrinkles: Thread a blunt needle with black embroidery floss or thin black yarn. Stitch two horizontal skin folds directly above the muzzle across Rounds 6 and 7. Pass the needle under each stitch twice to build raised, distinct brow lines.
- Sew the Ears: Pin the top edge of each ear along Round 4 of the head, spaced about 4 stitches apart. Angle the tips forward toward the outer eye corners. Stitch the base flat to the head so the tips flap downward.
- Join Head to Body: Seat the head squarely on top of the open neck rim of the body (18 sts). Pin the head at four cardinal points to keep it from shifting. Sew through both loops of the body and the corresponding stitches of the lower head, pulling each stitch firmly to eliminate neck wobble.
- Attach Legs and Tail: Pin the two front legs vertically under the chest and the two rear legs horizontally at the lower sides of the body. Sew firmly with mattress stitch. Position the curled tail on the lower back rump and stitch its base securely so the coil arches upward over the hip.
Pinning every component before stitching prevents asymmetrical facial features and head tilt so the finished amigurumi maintains its signature puppy-like expression.
Note: Maintain even thread tension when embroidering forehead wrinkles so the stitches lie flat against the yarn loops without puckering the fabric during long-term handling.
Troubleshooting and common mistakes
Even experienced crafters encounter occasional challenges when working with compact amigurumi patterns. Identifying common errors early allows you to correct them quickly:
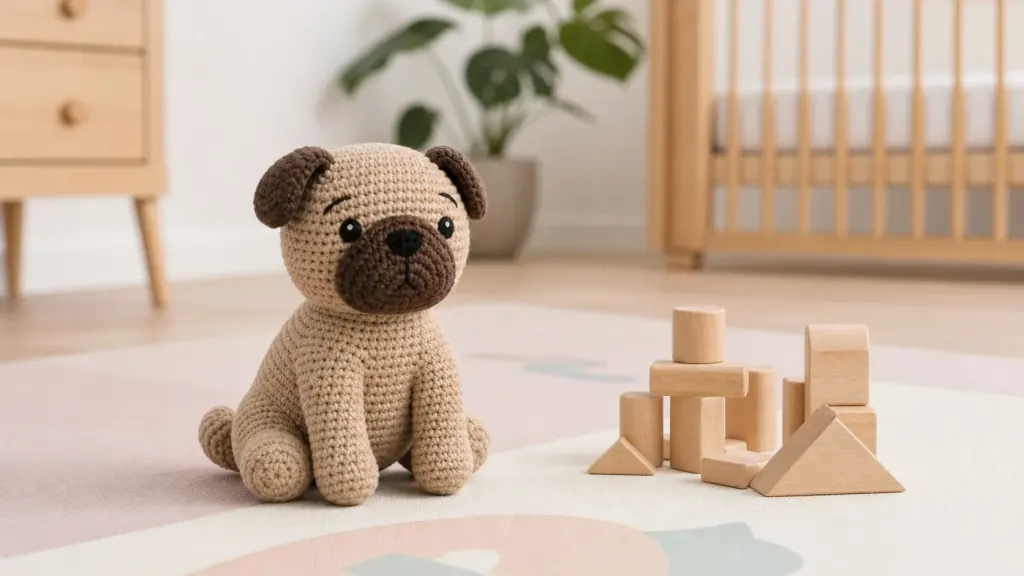
- Stuffing Showing Through Stitches: If white fiberfill pokes through gaps between single crochet stitches, your stitch tension is too loose. Switch down a half hook size, such as from 3.5 mm to 3.0 mm, or practice pulling each yarn over slightly firmer.
- Lopsided Head or Limbs: Asymmetrical placement happens when parts are sewn on by eye without pins. Always insert dressmaker pins around the entire edge of each limb and check the plushie from front, top, and side angles before sewing.
- Curled Tail Losing Its Spring: If your pug’s tail hangs limp, the foundation chain lacked sufficient stitch increases. Ensure you place two complete single crochet stitches into every chain space across the foundation strip.
- Loose Safety Eye Washers: If safety eye backings slip or feel loose on the post, the crochet fabric between the washer and eye is too thin. Slide a small square of felt over the post behind the crochet fabric before snapping the lock washer on.
Fixing sizing and proportions
Maintaining consistent scale ensures your finished plushie matches standard adult pug dog proportions in miniature form. If the head appears disproportionately large compared to the torso, verify your round counts on both pieces. Crocheting with uneven tension creates larger rounds toward the end of a piece. Checking stitch counts at the end of every round prevents unexpected shape distortion.
Finishing touches for realism
Small finishing adjustments make a significant difference in the final appearance of your crochet dog. Gently pinch the folded ears with your fingers to reinforce their forward crease. Use a stiff makeup brush dipped in a tiny amount of black powdered pastel or charcoal to lightly shade the skin folds around the muzzle for enhanced depth. Integrating thoughtful care details gives handmade plush toys the same longevity that owners seek when establishing a daily pug dog care routine for their living pets.
Safety, care, and display
Handmade amigurumi toys require proper safety precautions, especially when intended for young children or household pets.
According to the Code of Federal Regulations 16 CFR Part 1501 small parts safety standards, plastic safety eyes and noses measuring 9 mm can present a severe choking hazard for children under 3 years old if detached under biting or pulling pressure. When making a crochet pug for infants or toddlers, replace plastic hardware with firmly embroidered French knots and satin stitches using black cotton floss.
To preserve the appearance and hygiene of your crochet pug over a long pug dog lifespan, follow gentle cleaning methods:
- Spot Cleaning: Wipe minor surface dirt using a damp washcloth and mild dish soap. Avoid rubbing vigorously to prevent fuzzing acrylic fibers.
- Hand Washing: Submerge the plush toy in cool water with a small amount of wool wash. Squeeze gently without twisting or wringing, press between two clean bath towels to absorb excess moisture, and reshape to air dry flat.
- Display and Storage: Keep your finished crochet pug on a shelf away from direct sunlight, which can fade dark black muzzle yarn over time. Store handmade toys away from curious family pets who might mistake yarn plushies for chew toys during energetic pug blanket burrowing behavior.
Variations and further projects
Once you master the standard fawn amigurumi pattern, you can adapt the template to create unique variations:
- All-Black Pug: Replace the fawn yarn with solid black or charcoal worsted yarn for the head, body, and legs to make an all-black pug.
- Apricot Pug: Substitute warm peach or apricot-tinted yarn for the body while keeping the deep black mask and ears for striking contrast.
- Scale Variations: Use lace weight yarn with a 1.5 mm hook to make a delicate 1.5-inch keychain charm, or use super bulky blanket yarn with an 8.0 mm hook to create a large cuddly pillow.
- Crossbreed Designs: Modify the ear shape and muzzle length to crochet hybrid dog breeds, such as a chug pug chihuahua mix pattern with semi-erect ears or a puggle pug beagle mix coloration with longer dropped ears and hound saddle markings.
Frequently asked questions about crocheting a pug dog
Can beginners crochet an amigurumi pug dog?
Yes, beginners who understand single crochet, magic ring, increasing, and decreasing can complete this pug pattern. Crocheting the fawn head and body first allows novices to build confidence before tackling the black yarn muzzle.
How much yarn is needed to crochet an amigurumi pug?
A standard 7-inch crochet pug requires approximately 150 yards of fawn worsted weight yarn for the torso and head, along with 50 yards of black worsted weight yarn for the ears, muzzle, and tail.
How do you make the pug tail curl naturally?
Work two single crochet stitches into every foundation chain stitch across the tail strip. Placing double stitches into a single chain forces the fabric edge to contract and coil into a tight spiral.
Are crochet amigurumi toys safe for babies and toddlers?
Crochet toys with plastic snap-in safety eyes are not safe for children under 3 years old due to choking risks under CPSC guidelines. Use embroidered cotton thread for all facial features on toys made for young children.
Conclusion
Crocheting an amigurumi pug dog is an enjoyable and rewarding fiber arts project that brings the charming traits of the beloved toy breed to life. By selecting the right worsted weight yarn, maintaining tight stitch gauge with a 3.5 mm hook, and carefully assembling the folded ears, boxy muzzle, and curled tail, you can craft an adorable keepsake for yourself or a fellow dog enthusiast. Gather your supplies, start your magic ring, and begin crocheting your pug today.


Leave a Reply